Create a new calendar view using Microsoft Lists
One thing that has been missing from the world since we moved to modern SharePoint is the ability to have a more classic calendar view of a lit that we enjoyed during the earlier SharePoint versions. Microsoft has now enabled us to do just this. There are a few things you need to do to setup your list for success:
- Create your list by using either the Lists app or from within your SharePoint site.

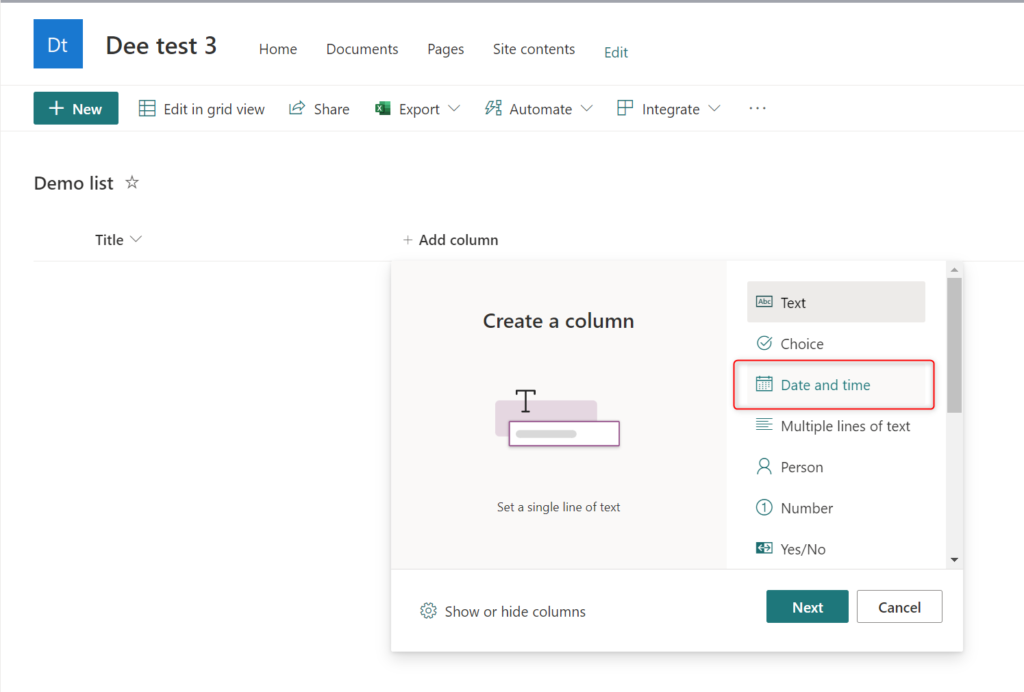
Now that you have made your list, you will have a default title. This will become the name of the item you want to show on the calendar. The piece you are now missing is having a specific date for your item. In order to do this, you will need to add a new Date and Time column.

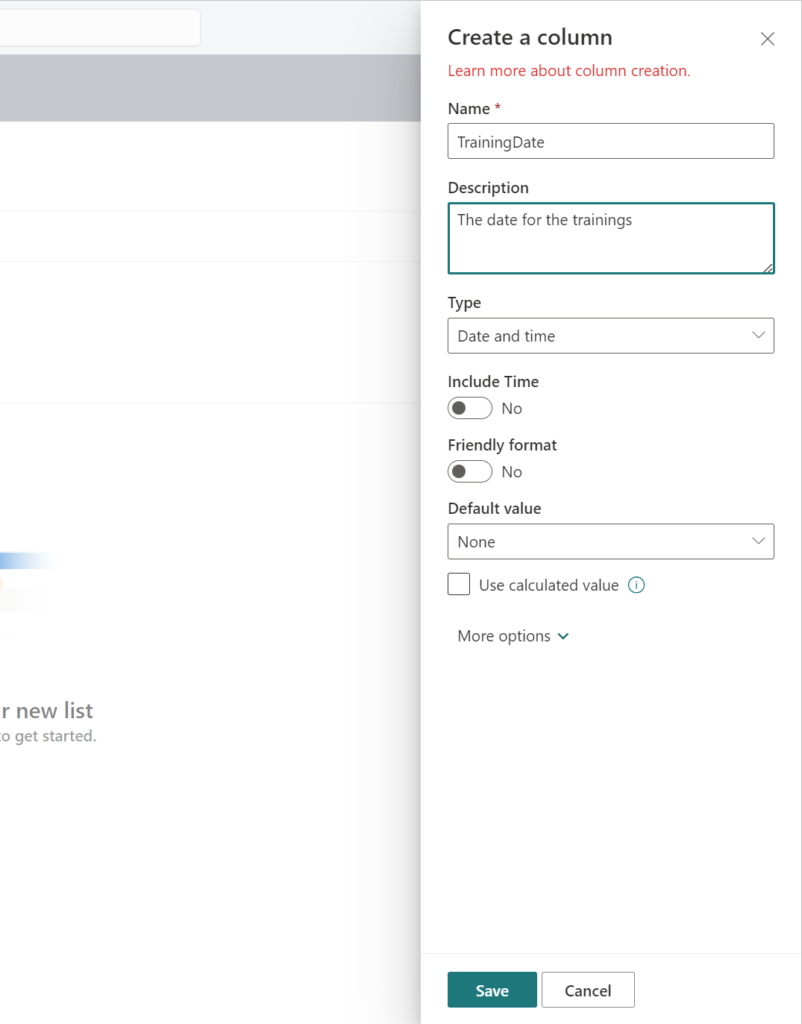
Be sure to give the column and new name.
Tip: for Column names, it is best to not have any spaces between words i.e. BestPractices vs Best Practices. This will help if you ever need to reference it later through development so you will not have the %20 space showing.

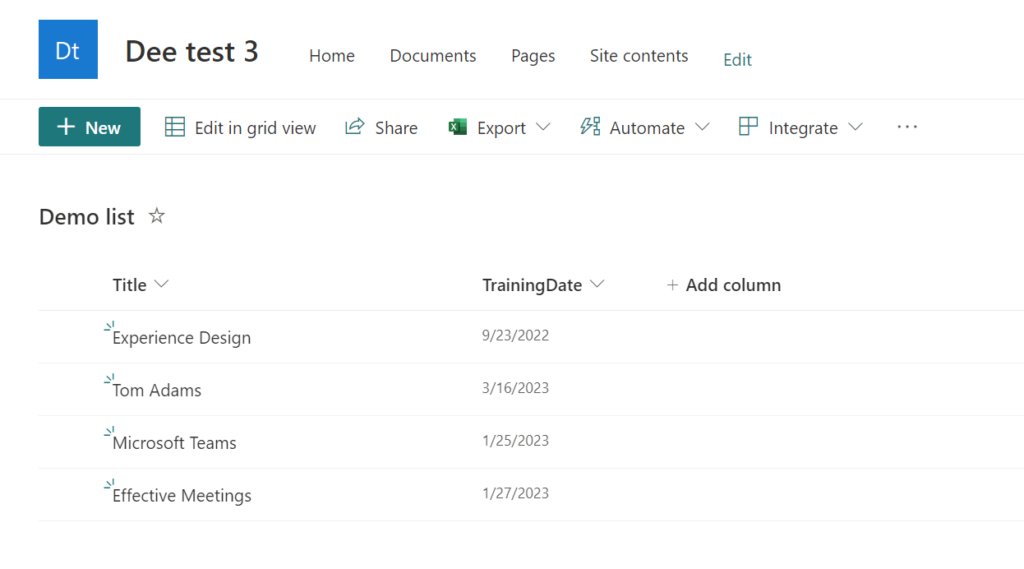
Now you can add your items to the list. Once you have your items added

Now you need to create a new view to be able to see the items in a calendar.
- Select All items from the command bar and then select Create new view.

From the popup, give the view a name. Make sure the name of the view will be understood by others.
Select the Calendar option from Show as
For the layout, select if you want to show the entire month or only a week at a time. Showing the month will give you the look for the classic calendar views.
Make sure you select the visibility as public so that others can see it.

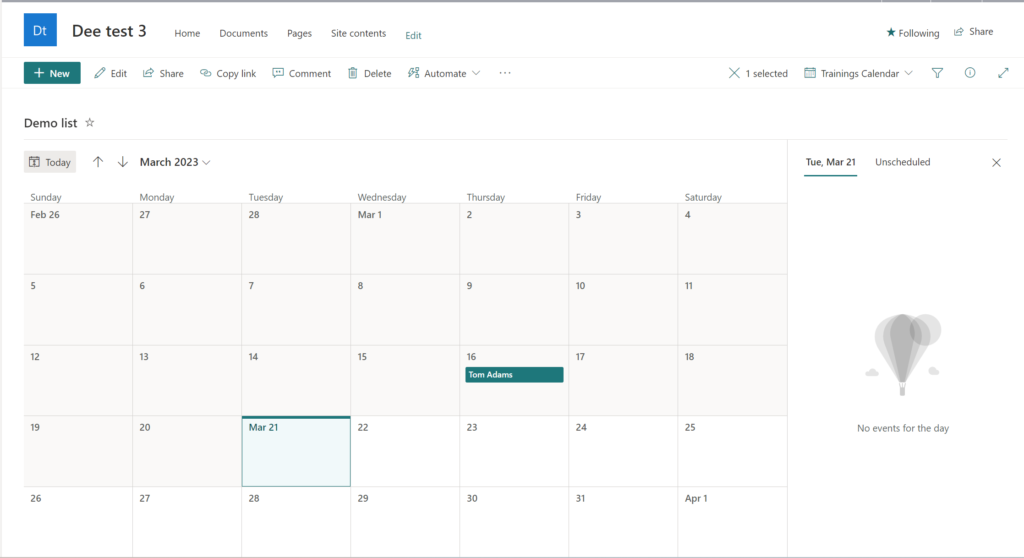
You can now see your new calendar view.

Some areas to think about
The calendar view does not allow for repeat events, so if you are trying to create a reoccurring event, decide if the item is for a smaller collaboration team you may consider using the group calendar web part that uses the Microsoft 365 group and Outlook capabilities to help you accomplish your goals.
